


So your costume is all finished, shiny, and brand new, but there’s only one little problem: it should look like you’ve travelled for years on foot, only resting by camp fires, having to fight off dragons and monsters to make it by in the wilderness. Your armour should be war-torn and your sword dented and scraped. Sadly, just going outside and rolling around in the mud, as fun as it may be, won’t achieve the look of years of wear and tear. Don’t worry, we’ve got a few tips and tricks for you to start looking worn down in no time!
Weathering
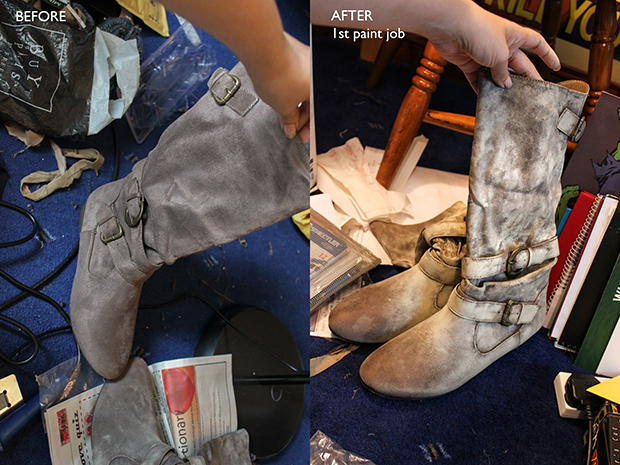
You can easily make something look distressed and worn by painting it with acrylic paints (good for use on most surfaces, especially cloth and wood) in tones that are lighter and/ or darker than the original colour of your piece. Dry brush it on so the result is uneven, or apply it with a textures sponge (like a natural sea sponge). In the image above, I painted the boots with light cream coloured paint. Acrylic paint is permanent and will not wash out.
Dirt on clothes
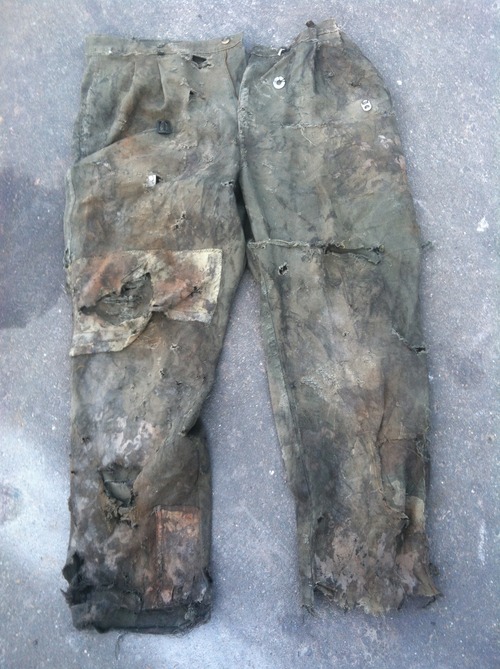
Dirtying your clothes will all depend on what type of dirt you’re looking for. Wet mud, dry dirt, grease stains all look incredibly different and can be achieved through a series of ways. A permanent way of dirtying yourself down is by applying the same method as the weathering above, using acrylic paints in shades of brown. For some not so permanent methods, you can use makeup and facepaints on your clothing, you can sprinkle things like plaster (an alternative would be flour, but wash it out after so there’s no risk of mould forming on your clothes) or using actual mud and dirt (it’s best if you source dirt from places where you’re sure there are no contaminants, like dirt used for potted plants. Just be sure there’s no fertilizer in it!).
Dirt on skin
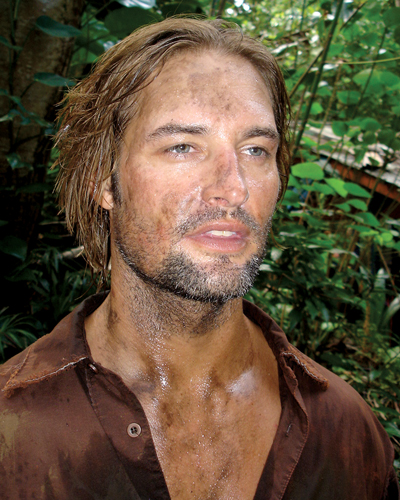
Now please, don’t go covering yourself in mud that you’ve just found randomly outside. You never know what’s in it. There could be broken glass, feces, or other things you wouldn’t want to be rubbing all over your face or getting near your eyes! There are special makeup products you can buy, like these:

Or you can just use black and brown face paints or grease paints applied with a textured sponge. You can also use things like ground coffee mixed in with vaseline to put in your hair or skin (mixing coffee with fake blood is also great to get a dry and coagulated texture).
Dirty teeth
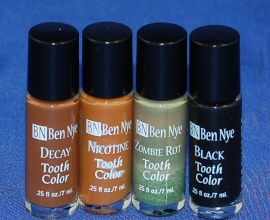
Same rules apply for your teeth. You want to stain them temporarily, not permanently! So don’t use things you’re not sure of. Special teeth enamel exists in various colours so you can get different types of decay (using these is especially great for zombies!). Special tip: the colour in these is usually super opaque and goes on really strongly, so you can dilute it with a bit of IPA (alcohol) to get a wash off the colour.
Stains
When you need some stains, but they’re not necessarily dirt stains (they might be sweat or you need to make something look old), tea is your best friend. Yup, grab that cuppa and splash it on your clothes, just don’t be wearing them when you do this! You can make the black tea as strong as you’d like and it will give things a nice yellowish stain. Coffee works, too! Just put it in a spray bottle and spray your heart away. This will stain fabric, so it won’t come off completely in the wash, but it also isn’t as permanent as paint, so you may have to intensify it after washing.
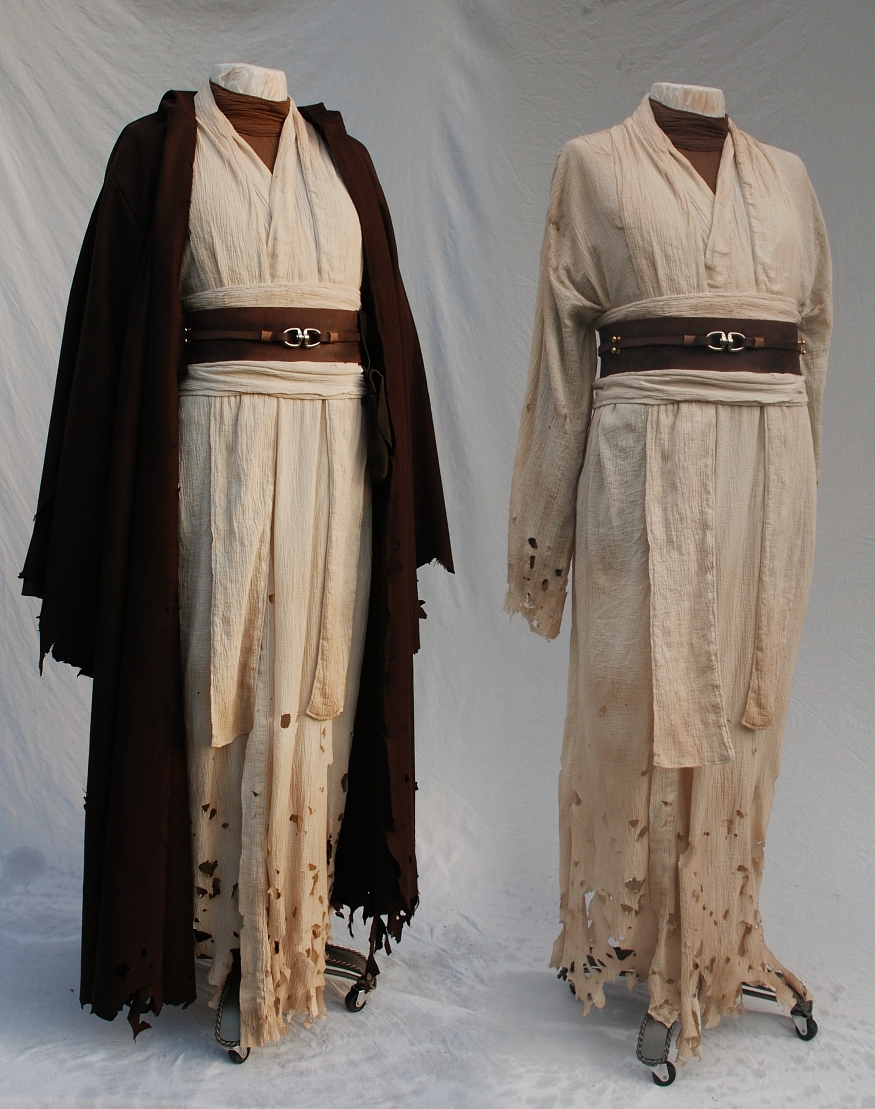
Rips & Tears
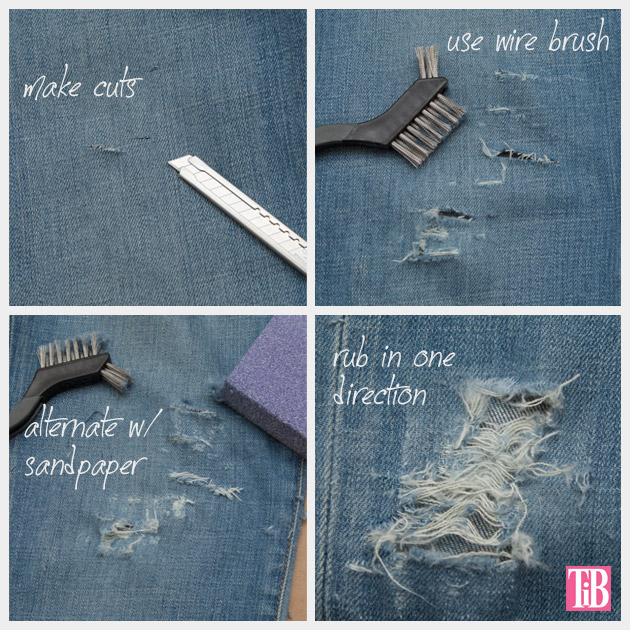
If you grew up punk, you might know a thing or two about distressing fabric, but I’ll share with you a few tools that may not seem obvious and can help loads when doing this. You can use the traditional sandpaper and a metal brush, or go for something like a grater or serrated knife. There’s a tool called leather rougher which also works wonders and helps get the job done quickly. Keep in mind the places where clothing would usually be well worn out: sleeve cuffs, collars, knees, bottoms, and hems. Also, be sure to be extra careful when working with these tools!
Beat Up Armour
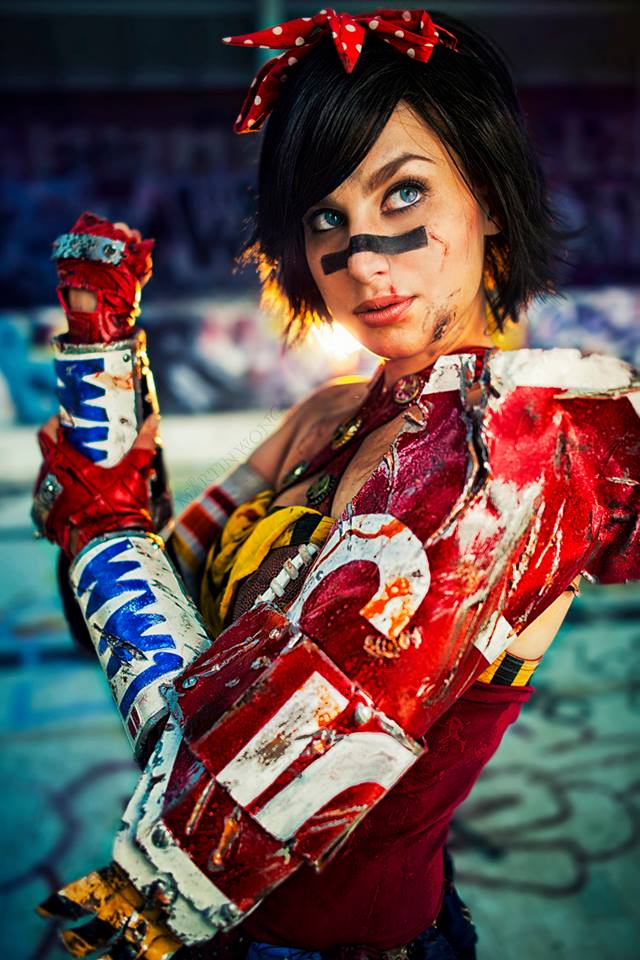
For creating dents and scratches in armour, a great tool to have is a soldering iron. You can use it to make gashes in worbla, eva foam, wood, and many other materials you may use for your armour and props. A rotary tool will also help in making cuts and scrapes.
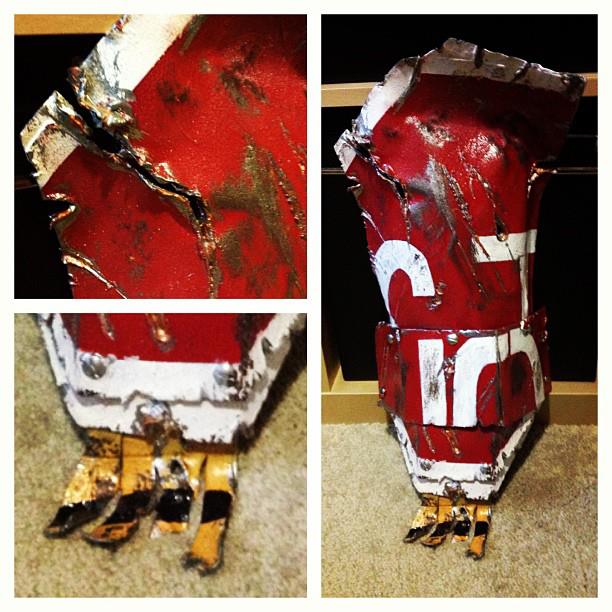
The paint job you apply to these dents is almost as important as the scratches themselves. Painting them in with black paint (if your armour is silver or gold) or silver (if it’s meant to look like metal that lost a layer of paint) will make a world of difference and will really help to bring out the battle damage. All of this is obviously permanent., so while it may pain you to knock up your armour, it will definitely give it that extra realistic edge.
What are some of your favourite techniques for getting gritty with your cosplays? Let us know in the comment section bellow!